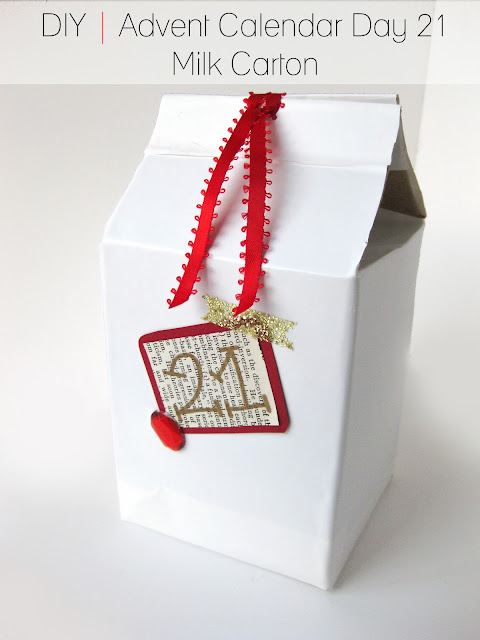
Debbie mentioned that she was on the lookout for a mason jar with handle that she could use as a mug and I knew exactly where to find it: the 99c store! (Cue profession of undying love for the 99c store) I've seen these sold for much more at other places like Walmart and Michaels so it was awesome finding it there. Since this was by far my largest gift, I designed a cute little milk carton to hold it. I've included two options for you to download: one has the bottom and sides separate and one with all the components already connected.
DIY Milk Carton
(Difficulty: Easy)
Supplies
(1) Download the template here! Option 1: SIDES | BOTTOM | Option 2
(2) Scrap cardboard / old cereal boxes
(3) Double tape
(4) Shelf / drawer liner
(5) Hole punch
(6) X-acto knife
(7) Scrap ribbon
(8) Colored scrap paper
(9) Old book pages
(10) Glitter
(11) Metallic marker
(12) Scissors
Steps(2) Scrap cardboard / old cereal boxes
(3) Double tape
(4) Shelf / drawer liner
(5) Hole punch
(6) X-acto knife
(7) Scrap ribbon
(8) Colored scrap paper
(9) Old book pages
(10) Glitter
(11) Metallic marker
(12) Scissors
1. Print out the template and trace onto your scrap cardboard. Cut along the solid lines and score along the dotted lines (folding lines). The gray areas will be where your double tape should stick. Assemble box.
2. Begin by covering your carton with shelf liner, first the base and then the sides.
3. On the two top flaps without the folds (the flatter part that doesn't push in), make an incision with your X-acto knife through each flap above the scored.
4. On the other two flaps with the parts that push in, punch a hole on each as shown.
5. Place your gift inside. Thread a piece of scrap ribbon through the two holes and tie a bow or knot to secure.
6. (Apologies but for some reason, I can't seem to locate the photo that shows the ribbon being threaded through the two top incisions.) But next, you're going to cut another piece of scrap ribbon, fold it in half forming a loop, and thread it through the two incisions you made. Pull the two ribbon ends all the way through the loop.
7. For decoration, I cut a rectangle out of scrap colored paper and book pages with the numbered day. I added on a faux gemstone and dipped a piece of double tape into glitter, cutting triangles out of both ends to make the glitter "tape".
This was a super fun box to put together; enjoy!
All Advent Calendar-related posts can be found here.
Want to see what Debbie got me? Follow me on Instagram!


Hola, has realizado un trabajo increíble. Definitivamente lo cavaré y, en mi opinión, sugeriré a mis amigos
ReplyDelete