As I may have mentioned before, I suffer from the "ooh-I-can-totally-DIY-that" (but-I'll-actually-never-get-around-to-it) syndrome. I've got literally hundreds of potential projects and recipes bookmarked and saved onto my computer that I want to try but never see again (heh). Searching for that project or recipe that I saved a few weeks ago is absolutely bewildering...
Fueled by Fruit By The Foots and jammin' to K-pop, and I'm
Inspiration can be found in the least expected places so I wanted a quick and organized way to jot ideas down as opposed to scribbling on the back of an old receipt only to lose it in my black hole of a purse. Spiral bound notebooks just aren't my thang because the disorganized me loves moving pages around while binders pinch my fingers... What better way to organize potential blog topics (and learn some rudimentary bookbinding) than creating a custom blog planner?
(Virtual fist-bump for Cafe Craftea's first DIY tutorial! Excuse the poor quality pictures taken with my phone :X)
DIY Blog Planner With Removable Pages
(Difficulty: Intermediate - Advanced)
Supplies
-Download the template here.
(1) Cardboard (free, old cereal boxes work great!)1a) Two 0.375" x 7" pieces
1b) Two 5.5" x 7" pieces
(2) 1 roll shelf liner/contact paper (99 Cents Store)
2a) One 2"x 7.5" piece
2b) One 14" x 9" piece
(3) 40 Sheets Filler paper (~free, lined/white or any paper works!)-cut to 11" x 7"
(4) Thin Elastic string (~$2, any craft store)
(5) 1 Sheet of Cardstock (~$1, any office supply/craft store)
5a) Four 11" x 7" pieces
5b) One 11.25" x 6.5" piece
6) Title/End Pages
-cut to 10" x 7"
(7) Ribbon (optional) (1 spool ~$1, any craft store)
(8) Clear Sticker Labels (optional) (not shown, any office supply store)
 |
| What's ReadyCart? |
Steps

1. Fold filler paper in half. Divide into 4 sections with 10 pages per section. I chose to have 4 sections: DIY/Guides, Recipes, Reviews, and Shop.


2. Cut out 4 pieces of cardstock according to the measurements, fold in half, and create 4 booklets. I was out of black cardstock...so I improvised with some brown paper.


4. Cut out contact paper according to the measurements. Center the small strip of cardboard and fold over the ends of the contact paper.
5. Measure about 3 and a half feet of elastic string. Make a knot with both ends.

6. Now here's the tricky part. Loop the elastic over the small strip of cardboard stuck to the contact paper as shown to create 4 loops. The cardboard may curl so do your best to keep it straight.

7. Position the elastic looped cardboard (sticky side down) in the center of the large sheet of contact paper (sticky side up). If you wish to include a bookmark, be sure to offset it to the right a bit before positioning the elastic.
8. Position the two remaining pieces of cardboard on the contact paper, leaving a little gap in between the cardboard pieces.
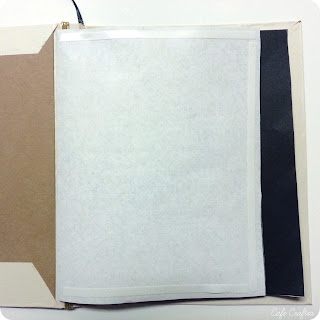
9. Trim the corners of the contact paper as shown and fold down to secure the cardboard. Turn it over and press out any bubbles. Then fold over the contact paper as shown.

10. Take your cardstock and attach double tape as shown.

11. Fold title page in half. Attach half with "info" to the cardstock. Repeat with end page.

12. Slip cardstock with title/end pages under the elastic. Flip over to the white side of the tile page and attach double table as shown. Press down onto front cover. Repeat with end page.

13. Slip each booklet under each elastic string. Anytime you want to switch out the booklets or move some pages, just take it back out from under the elastic :)
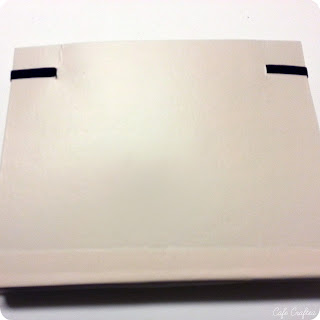
14. (Optional) If you want an elastic to hold your planner closed, make two slits in the back cover with an Xacto knife.

15. Cut a piece of thick elastic about 10 inches long and slip each end through the slit. I secured it with some thread and nail polish to keep it from fraying.
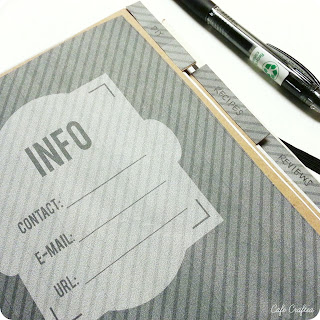
16. Print out one sticker label. I've included 4 designs for variety :)

17. (Optional) I made some tabs out of leftover cardboard and attached them with double tape.

18. Voila! Enjoy your new blog planner & happy blog planning!
Feel free to let me know if any of the steps were unclear! :)


this is so cute, i love this, thanks for post it
ReplyDeleteThanks for stopping by! Let me know how yours turns out! :)
DeleteThe whole sticker design can also be equipped with the support of identification decals, you can create it possible to keep these on the invitation cards of different people by circulating these among the visitors.
ReplyDelete